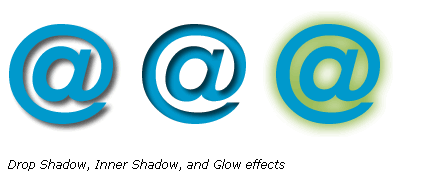
Applying shadows and glows
Fireworks makes it easy to apply drop shadows, inner shadows, and glows to objects. You can specify the angle of the shadow to simulate the angle of the light shining on the object.
Follow the given instructions exactly to draw the following 3 @'s symbols.
1) Start Fireworks
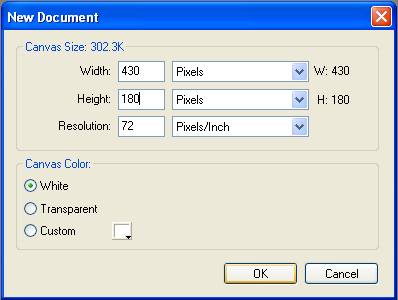
2) Create a new file according to the following:
3)
Using the Textbox tool![]() ,
create a text box
,
create a text box
4) Type: @
5)
Click on the text box using the pointer tool![]()
6) Change the following in the properties inspector,
- Width: 130
- Height: 130
- Text colour: black
- Font size: 100
7)
Using the pointer tool![]() ,
click on the text box,
,
click on the text box,
- Press: Ctrl + C to copy
- Press: Ctrl + V to paste
8)
Using the pointer tool![]() ,
click and drag the new textbox just
to the right of the original one.
,
click and drag the new textbox just
to the right of the original one.
- Press: Ctrl +V to paste another copy
9)
Using the pointer tool![]() ,
click and drag the 3rd textbox to the
right side
,
click and drag the 3rd textbox to the
right side
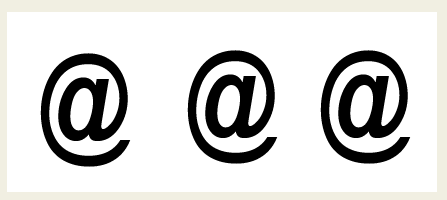
Your screen should look similar to the following:
10)
Using the pointer tool![]() ,
click on the first text box:
,
click on the first text box:
To apply a drop shadow:
- Set the text colour of @ to #0099CC.
- Click
the Add Effects button
 in the bottom right corner of the Property inspector,
 - Choose a shadow option from the pop-up menu:
- Shadow and Glow > Drop Shadow
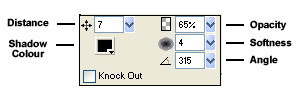
- Edit the effect settings in the pop-up window:
- Drag the Distance slider to 7.
- Click the color box and set the shadow color to #333333.
- Drag the Opacity slider and set the percentage of transparency to 70%.
- Drag the Softness slider to set the sharpness of the shadow to 4.
- Drag the Angle dial to set the direction of the shadow to 320.
- Select Knock Out to hide the object and display the shadow only.
- When you finish, click outside the window or press Enter to close it.
- Double-click
 to edit drop shadow
properties.
to edit drop shadow
properties.
- Select Knock Out to show the object and display the shadow.
11)
Using the pointer tool![]() ,
click on the second text box:
,
click on the second text box:
To apply an inner shadow:
- Click the text colour of @.
- Using the eye-dropper, click the first @ and you should notice the colour has changed to the colour of what you clicked on.
- Click
the Add Effects button
in the bottom right corner of the Property inspector,
- Choose a shadow option from the pop-up menu:
- Shadow and Glow > Inner Shadow
- Leave the defaults in the effect settings in the pop-up window:
- When you finish, click outside the window or press Enter to close it.
12)
Using the pointer tool![]() ,
click on the final text box:
,
click on the final text box:
To apply a glow:
- Change the text colour to #0099CC using a technique from above.
- Click
the Add Effects button
in the Property inspector, then choose Shadow and Glow > Glow.
- Edit
the effect settings in the pop-up window:
- Click the color box and set the glow color to #669900.
- We will leave the remaining settings at their defaults, but feel free to move them to see the effect they have on the object.
- Drag the Width slider to set the width of the glow.
- Drag the Opacity slider to set the percentage of transparency in the glow.
- Drag the Softness slider to set the sharpness of the glow.
- Drag the Offset slider to specify the distance of the glow from the object.
- When you finish, click outside the window or press Enter to close it.
13) You should now have 3 @ signs with different effects.
Save as: Shadows (in your Text Effects folder)
Proceed to the Embossing.