Applying a Gradient Fill
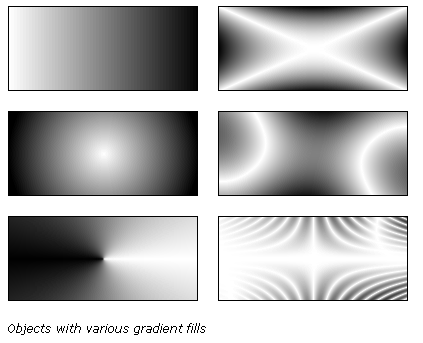
Fill categories other than None, Solid, Pattern, and Web Dither are gradient fills. These fills blend colors to create various effects.
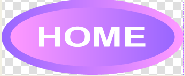
We will be using the gradient fill to create a navigational button for a website.
1) Create a new file according to the following:
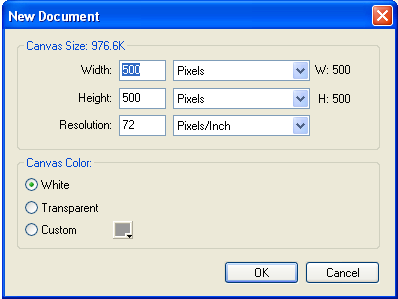
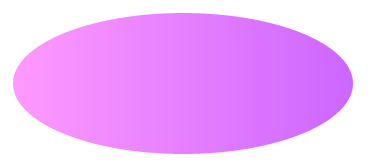
2) Using the ellipse tool, draw an ellipse on the canvas, set the W: 340 and H: 140.
3) Change the colour to #CC66FF.
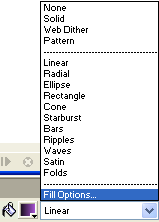
4) To apply a gradient fill to a selected object: change the Fill Category to linear.
Editing a gradient fill
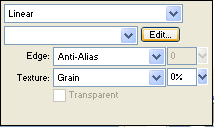
5) To edit the current gradient click Fill Options in the Edit Gradient pop-up window.
6) In the Edit Gradient pop-up window, click Edit.
7) Change the left colour swatch to #FF99FF.
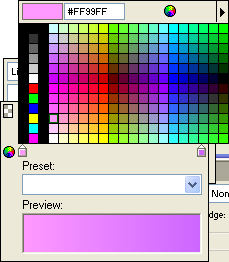
8) Click Enter, then Esc to exit back to your image that should look as follows:
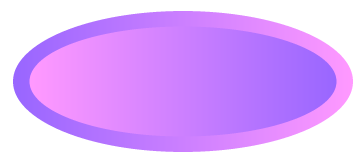
9) Draw a second ellipse over the first one. This ellipse should have W: 307 and H: 110.
10)
Select the smaller ellipse using the pointer tool ![]() .
.
11) Choose Modify > Transform > Rotate 180° to make the image look like the following.
12) Create a text box with "HOME" in it, over your button, with the following properties:
- Width: 215
- Height: 60
- Font Size: 50
- Font Colour: White
- Alignment:
Stretch

13) Using the pointer tool, select all 3 objects by clicking and dragging a rectangle around them.
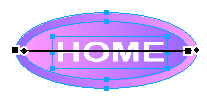
14) Choose Modify > Align > Center Vertical.
15) Choose Modify > Align > Center Horizontal.
16) Choose Modify > Flatten Selection to make this all on image, rather than layers.
17) Choose Modify > Canvas > Trim Canvas.
18) Choose Modify > Canvas > Canvas Colour > Transparent.
19) Save the file in your Shape Effects folder as Gradient.
20) Proceed to Cropping Images